UPDATE APRIL 2018:
Cocoapods v1.5.0 started supporting static libraries, and somehow breaking the way frameworks are imported into Playground. If you encounter Playground execution failed: error: Couldn't lookup symbols: ..., then it is likely the modules are not properly imported.
A fix is to revert back to v1.4.0.
sudo gem install cocoapods -v 1.4.0
pod _1.4.0_ install
Playground is a very useful tool, especially for building UI, as you can preview them almost right away, saving many hours building and running on simulator.
New in Xcode 9, we can now add custom framework to Playground, therefore providing a quick way to integrate with existing project.
This post will show how to add Playground to an existing project, using Cocoapods along in it, and interacting with UI controls for instant feedback.
1. Open your project workspace
I am assuming you are already using workspace.
But if you are not, open the .xcodeproj and File > Save As Workspace.
2. Add new target
Select File > New > Target > Cocoa Touch Framework.
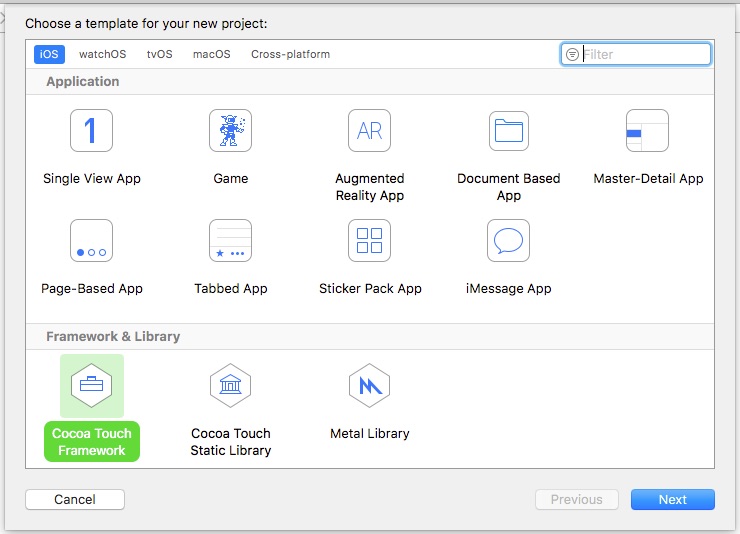
Let’s name the new target “MyUIPlaygroundFramework”.
Do NOT embed this framework in the app’s original target.
This new “framework target” builds the framework, which provides code available to use in Playground.
3. Add files to target
Add a new Swift file, making sure it is available to the target.
In File Inspector, make sure the target “MyUIPlaygroundFramework” is checked.
You can also add existing files to the framework, exposing them to Playground later. If you use pods, then you need the pods to be available to the new target (read later section).
4. Build the framework
Select the Scheme and Build.
You must manually build each time you made changes to the framework.
5. Add Playground
In the workspace, File > New > Playground > Single View.
Save the playground file in the root folder, usually along with the Xcode xcworkspace and xcodeproj files. Drag and drop the playground file into the workspace.
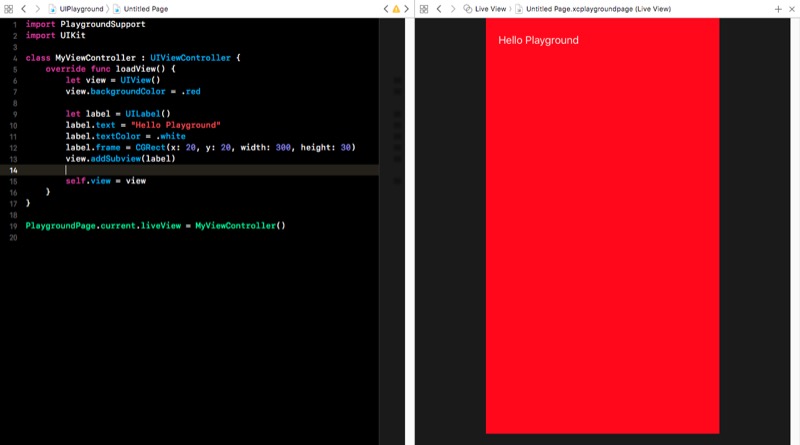
In the Playground page, import the framework, and set up a live view.
import PlaygroundSupport
import UIKit
import MyUIPlaygroundFramework

class MyViewController : UIViewController {
    override func loadView() {
        let view = UIView()
        view.backgroundColor = .red
        // Add subviews ...
        self.view = view
    }
}

PlaygroundPage.current.liveView = MyViewController()
You create your views in loadView, and see them in Live View (select Show Assistant Editor).
Just like Playground, code changes will be reflected almost right away.
6. Using Cocoapods
You cannot import a Cocoapods module in playground, yet.
If the Swift file requires the use of Cocoapods, you have to make it available to the target as specified in Podfile.
We make Cartography, an awesome library for constructing autolayout, for the framework:
target 'MyUIPlaygroundFramework' do
    pod 'Cartography', '~> 1.1.0'
end
pod install, build framework again, and you will now be able to import Cartography in Playground too.
Because now 2 targets are using the same Cargography lib, it is cleaner to define shared pods in Podfile. We leave that as an exercise for you.
Bonus: Expose public
The trick to making playground work is by importing MyUIPlaygroundFramework.
So if you are going to use any of your app’s custom view/controller/model/etc in the playground DIRECTLY, you need to expose them with public access level.
Limit what you gonna expose.
The use of playground here is merely to play with the UI, so exposing custom UIView to public is ok, but probably not other stuff.
Bonus: Custom Device Size
You can live view the UI with custom device size eg. iPhone 8 Plus, iPhone X, iPad, etc
Objc.io has provided a helpful Playground wrapper for devices.
Sample usage:
let parent = playgroundWrapper(
  child: vc,
  device: .phone4_7inch,
  orientation: .landscape,
  contentSizeCategory: .large)
PlaygroundPage.current.liveView = parent