If your debugger output is producing too many log messages, here are some ways you can reduce it.
OS_ACTIVITY_MODE
In every project, I will add OS_ACTIVITY_MODE to my scheme. This is because OS level logs are enabled by default.
Go to your scheme > Run > Environment Variables > Add OS_ACTIVITY_MODE > Set the value to disable.
Run, and all system logs will not be shown.
However, that will also not show logs from OSLog, even if they are from your own app. Oops..
So, if you’re using OSLog, then don’t add OS_ACTIVITY_MODE.
What is OSLog?
In case you didn’t know, OSLog is Swift logging framework (previously oslog). You can watch this WWDC 2020 session to learn more.
It is fundamental to understand how the 5 log levels work. In your app, you will write log with the levels accordingly.
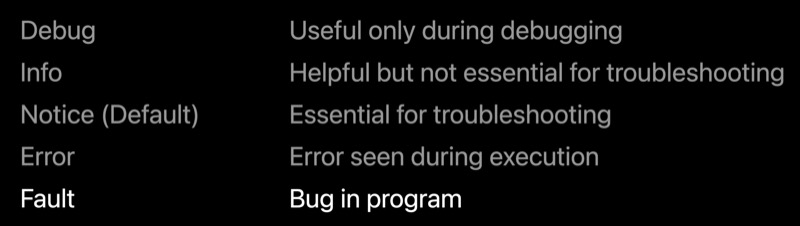
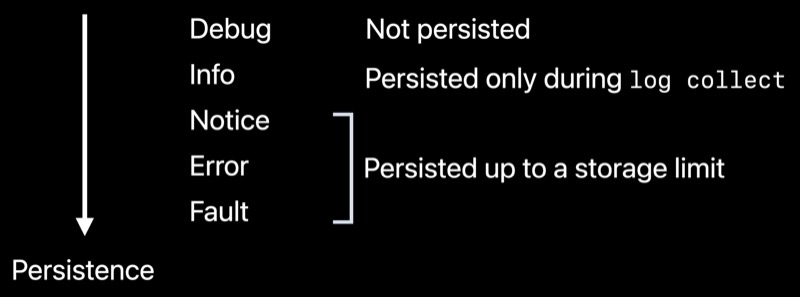
Also to note the persistence behavior.
Xcode console will show info level by default, which means debug level messages will NOT be shown, while info/notice/error/fault will be shown.
How to change OSLog level?
You can change the logging level while debugging using the log CLI.
Logging behavior is normally governed by the system. However, while debugging in macOS, you can enable different logging levels for a subsystem..
To reduce the amount of log, you can run:
sudo log config --mode "level:default" --subsystem com.zen.app
That will show notice (default) level and above, thus hiding info and debug.
You might try to set “level:error”, but that won’t work, as it is not a config as per man log. Only off | default | info | debug.
If you want to see your debug level log, you can use “level:debug”.
To check your current log level, run:
sudo log config --status --subsystem com.zen.app