Using UITableViewHeaderFooterView in Storyboard/Interface Builder is not easy because:
- It is not well documented
- There are a number of ways
- Things (iOS) change, and break..
For example, this highest voted answer in 2012 does not work well anymore (the section could disappear on reload).
As of writing, this guide is good for iOS 9.
And we will be using awesome swift code :)
Step 1: Subclass UITableViewHeaderFooterView
Add your custom class. We call it TableSectionHeader and it has only a UILabel in it. You will probably add other subviews/IBOutlets to it.
class TableSectionHeader: UITableViewHeaderFooterView {
    @IBOutlet weak var titleLabel: UILabel!
}
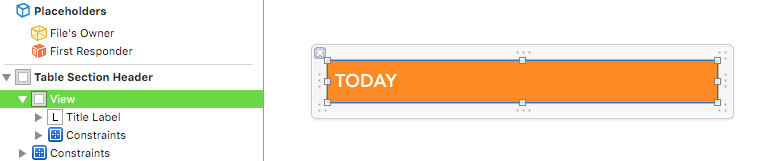
Step 2: Create the Nib
Add a Nib (Add new > User Interface > View), and customize it as follows:
- Change the class to
TableSectionHeader - In the “Table Section Header” view, make sure the background color is default. This is to avoid the warning Setting the background color on UITableViewHeaderFooterView has been deprecated.
- Add a View. This is a container and MUST be there to contain all the other subviews.
- Add the title
UILabel, and connect this to the IBOutlet in the class file. If you have other subviews/outlets, do the same.
Step 3: Register the Nib
In your view controller viewDidLoad, you need to register the nib with a reuse identifier.
let nib = UINib(nibName: "TableSectionHeader", bundle: nil)
tableView.registerNib(nib, forHeaderFooterViewReuseIdentifier: "TableSectionHeader")
Step 4: Implement viewForHeaderInSection
func tableView(tableView: UITableView, viewForHeaderInSection section: Int) -> UIView? {
    // Here, we use NSFetchedResultsController
    // And we simply use the section name as title
    let currSection = fetchedResultsController.sections?[section]
    let title = currSection!.name

    // Dequeue with the reuse identifier
    let cell = self.tableView.dequeueReusableHeaderFooterViewWithIdentifier("TableSectionHeader")
    let header = cell as! TableSectionHeader
    header.titleLabel.text = title

    return cell
}
The gist is using dequeueReusableHeaderFooterViewWithIdentifier to get back the header section cell. You can then configure the cell similarly to how you do it for normal row cells.
That’s it!
The Other Ways
This guide is for using Storyboard/Interface Builder to create your custom header/footer.
If all you want is to change the background color and text color, then you could simply override willDisplayHeaderView as described in elicere blog.
You can also refer to Apple sample code (in Objective-C)
Pitfall: Does not play well with Autolayout
One problem with UITableViewHeaderFooterView is that it does not play very well with autolayout.
It is possible to have autolayout, but as of iOS 11, it seems like Apple has a bug. You might encounter this error:
Unable to simultaneously satisfy constraints… ‘UIView-Encapsulated-Layout-Height’ …
The problem is that UITableView does something to the header/footer view, encapsulating it, and creating a required (priority 1000) constraint on the height.
And this height will be slightly taller than your layout (maybe to cater for the separator?). Anyway, the height does not match.
The workaround is that your height/bottom/vertical constraint has to be lowered. eg. 999
This workaround is effective for UITableViewCell too.